Adding Anaconda Environment to Jupyter
When using Jupyter, or Jupyterlab, you'll often times want to use different anaconda environments for different projects. Especially when you are working on a personal workstation. Unfortunately, even when installed with anaconda at the root level, jupyter doesn't automatically detect installed anaconda environments.
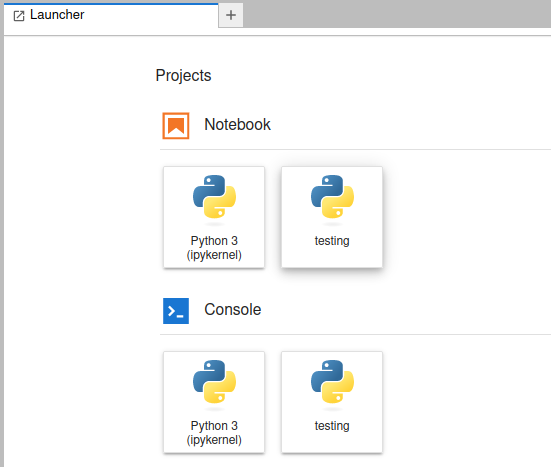
For example, in a default jupyterhub install you will only have a single kernel installed.

Adding the Kernel
Start be creating a new anaconda environment, or optionally a python virtual environment using one of the several available tools.
At a minimum, the ipykernel package must be installed.
# create and activate a new anaconda environment
conda create -n newkernel ipykernel
conda activate
Now add the kernel, being sure to add the --user flag if anaconda is installed
somewhere the user does not have permission to write to. Also, a name for the
kernel should also be provided as the default name may conflict with the default
kernel installed.
python3 -m ipykernel install --user --name newkernel
Now a new kernel should be available without having to restart the jupyter instance.
How does it work?
When a kernel is installed, a json file is installed in the user's home
directory at $HOME/.local/share/jupyter/kernels. This json file defines where
jupyter will look to start kernel.
{
 "argv": [
  "/home/akail/.conda/envs/newkernel/bin/python3",
  "-m",
  "ipykernel_launcher",
  "-f",
  "{connection_file}"
 ],
 "display_name": "testing",
 "language": "python",
 "metadata": {
  "debugger": true
 }
}